
Crée par Henk van der Vorst
An important question for me is: what possibilities are there to exploit one single drawing or picture as input for a more complicated picture? And the next question is how to design a small picture such that an interesting structure arises after replication. Of course, one may simply repeat the picture in a way as is done for wallpaper and in textile printing. This is often done with the application of reflection.
However, when a linocut is the starting point, as it was in my situation, then one has to make a second linocut of the reflected image. In order to avoid this additional work, I explored the idea of rotation.
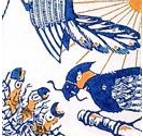
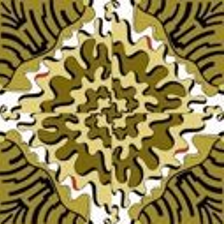
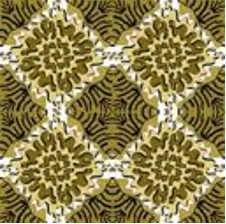
An example of this is the following one. The basis picture is a three-colour linocut print and we see at the right the result after four times of printing in which each time the print direction is rotated over 90 degrees.
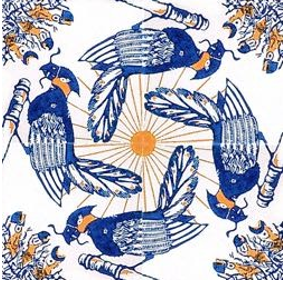
This printing process can be repeated and after 16 steps it leads to:
Of course, it is easy to apply reflection, when working with, e.g., Photoshop, but then rotation offers additional possibilities too. One has to realize that not every picture that can be rotated leads to acceptable results with reflection, as can be seen in the above example. With Photoshop it is also possible to exploit deformations, such as compression in one direction, or skew transformations, etcetera.
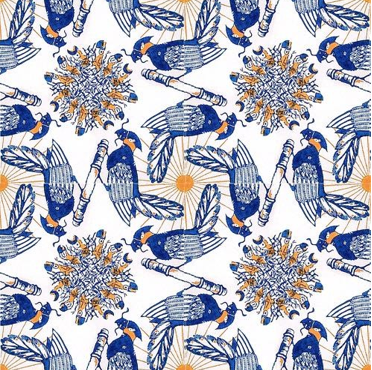
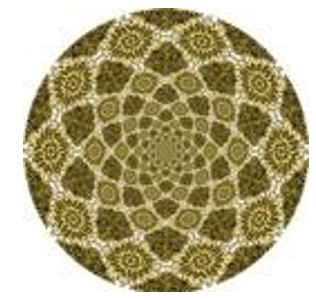
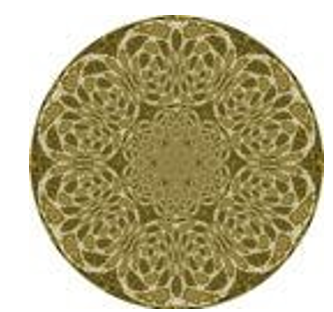
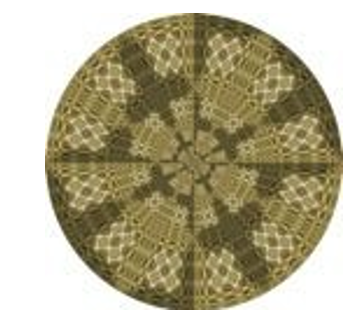
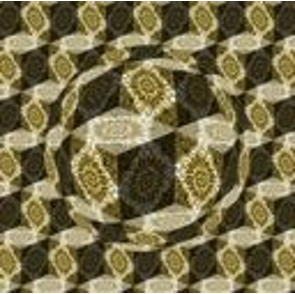
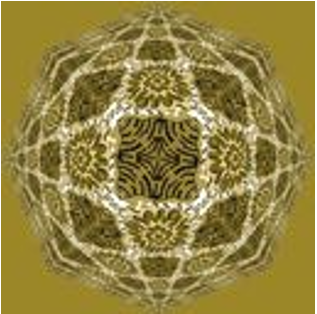
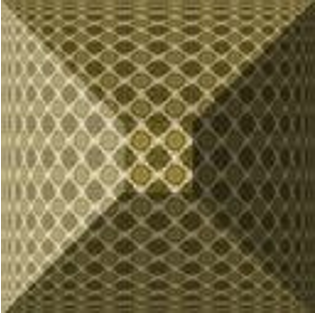
It is also possible to construct a band of repeated pictures and use the polar transformation to make it circular. (Inverse) polar and spherical transformations are currently my favourites. I used these transformations in the following examples, that are all constructed with the first coloured square line drawing.
Just as with painting or with a larger drawing, one has to make numerous decisions during the construction process in order to create a certain final result, and it is very difficult, if not impossible, to redo a picture in exactly the same way. One might view the basis picture together with the computer-editing as a recipe that is open for personal influences. In this connection the mural paintings of Sol leWitt come to mind; they are often realized by others via simple instructions on one page that is handed out by the artist.
People often suggest that there is a connection with Escher’s work when they see my work. Further on, I will comment on this.
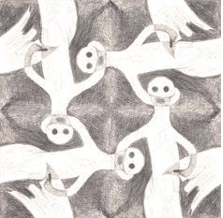
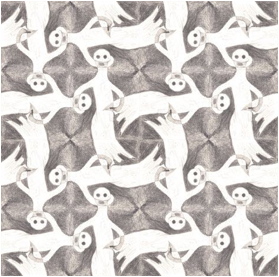
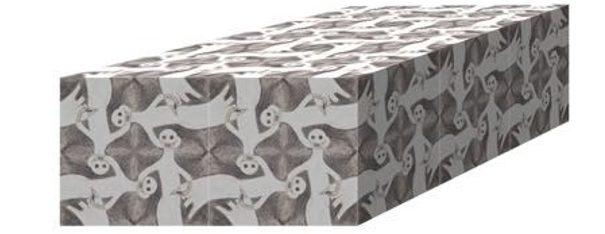
The square patterns are also suitable to cover rectangular three-dimensional structures, as is shown with the next “ghost”-square.

I will first demonstrate how this may be used to cover a simple beam:
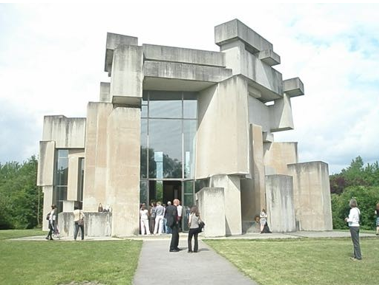
This offers new possibilities. See, for instance, the famous cathedral designed by the Austrian sculptor Wotruba, in Vienna. This cathedral is entirely constructed with concrete beams:
Covering these beams (in Photoshop!) with ghost-squares of various sizes leads to:
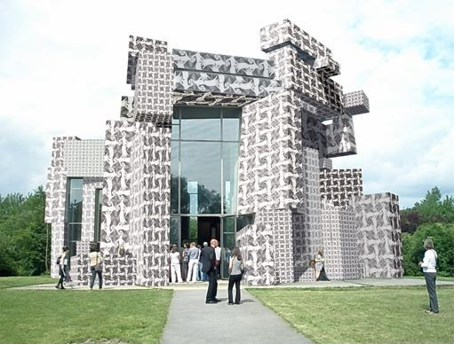
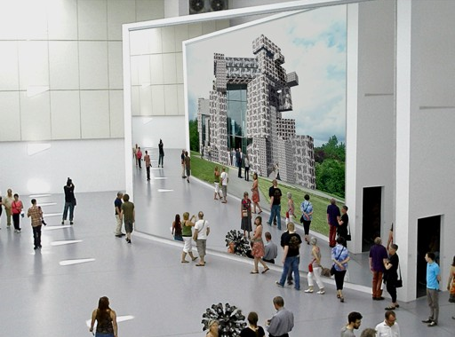
In my view this application was a little to straight forward, since I wanted to emphasize that this is a photoshop picture and not a real existing coverage of the building.
I tried to solve this by assembling this picture into another photograph which I took at the Documenta manifestation (Kassel, Germany, 2012). I made a few changes to the picture in order to make it more mysterious:
Differences with Escher’s work
M.C. Escher was inspired by mathematical tesselations of the plane for his famous work. For instance, for his circle limits he started from a hyperbolic triangular tiling of the plane (according to B. Ernst, De toverspiegel van M.C. Escher, Taschen Verlag, 2007, he saw such a tiling in a book by Coxeter). A similar tiling can be found on the internet (Wikimedia commons: Order_5_bisected_pentadiagonal_tiling by Tom Ruen):

Escher designed his tiles in order to fill the circle accordingly, but in a more artistic way, as can be seen in his “cirkellimiet I” (source: images.mapper.nl):
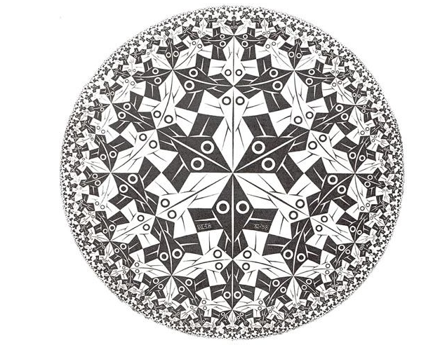
With this approach Escher had to draw the entire figure and to adapt shapes locally. This is a difficult and time-intensive task and it may explain that he constructed only a few of these limits. Note that the figures of Escher may be viewed as tiles and that he has freedom in the design of the shape of these tiles, as long as they fill the plane.
My approach is fundamentally different. The departure point is a square drawing or painting and with this square tile I try to cover the plane (or a circle or a square, or other figures) in such a way that a new picture arises. This process of filling is done, for instance, by repeated linocut prints or, more often, with photoshop. The latter approach offers far more possibilities and freedom. In the case of the filling of a circle my approach leads to results that remind one of Escher’s work.
Escher, however concentrated on the shape of the tile and exploited mathematical plane tesselations, whereas I focus on the content of the square tile (and as a result my tesselations are more or less trivial from a mathematical point of view).
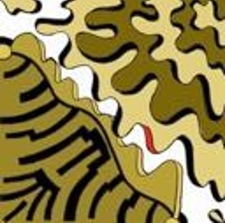
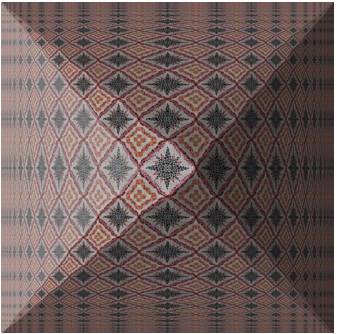
One more example of my approach is the following tile with a stone-pattern (a watercolour):

With photoshop I made several images; the first one is constructed by simply rotating the basic tile:

By expanding this figure horizontally and vertically (and compressing it each time by a factor of √2) and adding some shadow, I obtained:
Of course, these square tilings can also be used for folding purposes. The so-called Masu box can be folded from a square sheet of paper without using glue nor scissors. With this printed sheet:

and a similar slightly larger sheet one may fold the lid and the box:
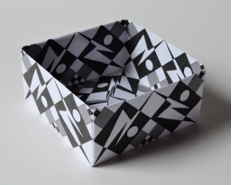
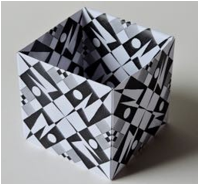
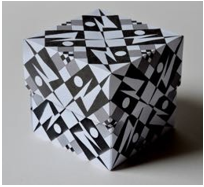
Note that both the exterior and interior of box and lid are covered by the design print and that this print is nicely continuous over the edges.
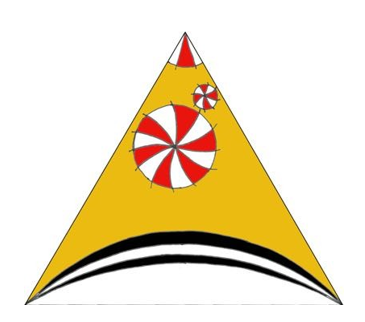
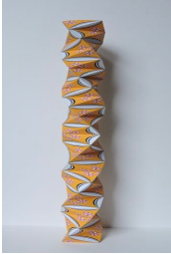
For many folding purposes, a triangular design seems to be more suitable. I will give a few examples. The idea is to make triangular designs that lead to nice fillings of the plane. This drawing has been made:
After scanning, the design has been coloured:
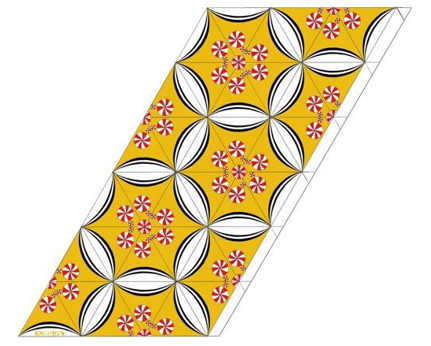
Then this triangle is applied to fill the following folding plan, which is a well-known folding plan by itself:
The horizontal lines should be valley folds; the diagonal lines should be mountain folds and then the left and right sides should be glued together, using the small overlap. The result is a small paper tower, which is remarkably stable by the way, even when printed on standard 80 grams printing paper.
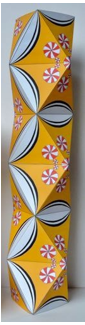
Many parameters can be varied in this folding plan, such as the angles of the diagonals, which may lead to more stable or to more unstable towers. It gives a lot of insight to play with this.
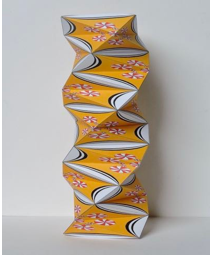
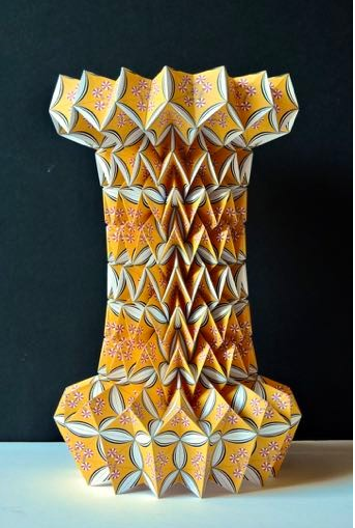
More complicated foldings, based on the V-folding technique (see Paul Jackson, “Complete Pleats”) can also be realized. In that case, one has to exploit the diagonals for appropriate folds:
As a final example, I show the result of the folding of a flexagon (in this case with another triangular design). The folding schemes can be found on the internet again.
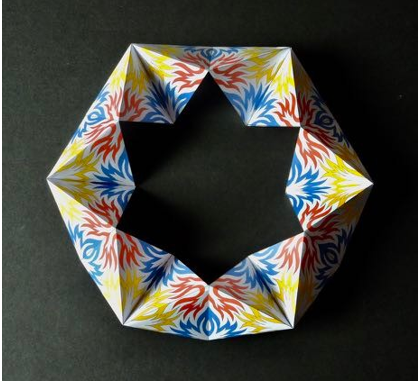
This folding concept also permits many variations, of which I show two:
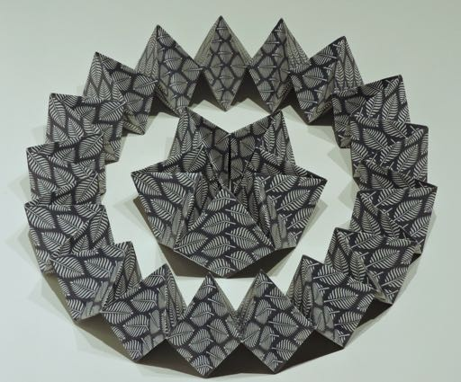
In these last two examples, commercially available wrapping paper has been used. In many of such available designs, it is possible to identify triangular substructures, suitable for folding.
More information : www.henkvandervorst.nl
March 4, 2021